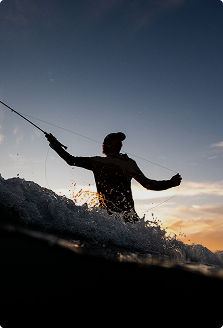
Wader Care
The number one reason waders come back to Simms for repair is not hard use - it's mildew. Hang 'em dry!


1. Protect
Always take your waders on and off using a protective mat to stand on to shield the neoprene from rocks, Simms makes a variety of storage bags with a built in changing mat for ease of use.


2. Dry
Waders Should be dried after each use. when you get home, you can hang your waders to dry thoroughly. Note that exposure to salt water requires special care.


3. Wash
Regular Washing helps maintain the breathability of your waders. depending on the number of days used, annual, bi-annual, or tri-annual washing is recommended.
The number one reason waders come back to Simms for repair is not hard use - it's mildew. Hang 'em dry!
After each use and before storing your waders, give them a quick rinse with fresh water to remove any mud or debris. Dirt can settle into the fabric and reduce the effectiveness of the breathable membrane. A post-use rinse removes buildup before it compromises the membrane. It's especially important to rinse after use in saltwater, as salt can gradually damage the wader seams, fabric, and hardware.
After rinsing, allow your waders to dry completely—both inside and out—before storing them. Storing waders while still damp can lead to mildew, which will shorten their lifespan. Once the exterior is dry, turn them inside out to ensure the interior dries fully as well.
Where you dry your waders matters as much as drying time. While basements and garages are common storage spots, they're not always ideal for drying. Choose a well-ventilated area with good airflow, and keep them out of direct sunlight, as prolonged UV exposure and daily temperature swings will damage the fabric and seams over time.
Washing your waders regularly and properly will ensure the best performance and longevity of the materials.
After washing, tumble-dry on a warm, gentle cycle or hang-dry your waders. We recommend a low-heat cycle such as tumble dry low, delicate, or gentle to ensure temperatures don't exceed 125°F.
Your waders' durable water repellent (DWR) treatment can be reactivated with heat. After your waders are fully dry, tumble dry for an additional 20 minutes. You can do this any time you notice water is no longer beading and running off the fabric.
If reactivating with heat doesn't restore water repellency, it's time to reapply DWR. Apply a DWR product of your choice — available in pump spray or wash-in formulas — following the product instructions. We recommend Nikwax and Granger DWR products.
To help prevent mildew growth, make sure waders are completely dry and store your waders in a breathable environment. Avoid keeping them in the original box, plastic bags, or sealed containers without adequate airflow. Instead, store them in a cool, dry place away from moisture and direct sunlight.
Roll waders for storage. Never fold — creases create weak points that fail over time.
For bootfoot waders, store them with the boots resting naturally on the ground. This helps reduce stress on the seam where the boot and wader material are joined.
The best way to minimize mildew growth is to properly dry and store your waders. Left unchecked, mildew can cause permanent damage and significantly shorten the lifespan of your waders. Once it develops, it cannot be removed. Mildew is highly destructive, working its way between layers and under seams, eventually causing them to separate and lift—leading to leaks over time.
While Simms offers several tools on simmsfishing.com to help anglers find the perfect size wader — nothing beats visiting your local retailer, having a conversation, and trying on a few different size options.
Getting the right fit is essential for the longevity and performance of your waders. Please refer to our Size & Fit Guide on each wader product page and contact our customer service team if you have any questions or concerns.
If waders are too small, every movement puts extra stress on the seams, causing premature wear and tear.
If waders are too large, excess material can bunch and rub together as you walk, leading to abrasion and pinholes over time.
Prior to removing tags or using your waders in the water, conduct a fit test indoors. Simulate typical on-water movements such as kneeling, climbing, and stepping in and out of a boat. Noticeable tension means seam stress. That stress will recur every time you wear them on the water.
Watch our quick video on how to measure yourself for the perfect fit wader.
When putting on or taking off your stockingfoot waders, use a changing mat or consider our Simms Taco Wader Bag or RiverKit Wader Tote to prevent the neoprene booties from coming into direct contact with the ground. After stepping into your waders, put your boots on right away and avoid walking around without them. Sharp rocks, gravel, or other debris can easily damage the neoprene. Even small particles can stick to the soles and continue causing wear once your boots are on.
Polyester, other synthetic materials, and wool are the best materials to wear under your waders, including socks and undergarments. These materials will wick moisture away from your skin, reducing moisture accumulation. Avoid cotton base layers and jeans. Also avoid belts, buckles, rivets, or other metal hardware — these cause abrasion and microscopic holes that accelerate wear on seams and the fabric backer. Need some more guidance? Visit our layering guide and video.
While Simms offers several tools on simmsfishing.com to help anglers find the perfect size wader — nothing beats visiting your local retailer, having a conversation, and trying on a few different size options.
Breathable fabrics are porous in nature and can collect dirt, oils from the skin and other environmental substances. Regular cleaning of waders is a key contributor to their lifespan.
We recommend washing and drying rain jackets on a gentle cycle with medium heat and drying on warm for up to 15 minutes. A small amount of heat brings any existing DWR back to the surface, redistributing it across the fabric. Hang to fully dry after each cleaning. Regular washing and drying will extend product lifespan. Oils from skin and salty perspiration can break down adhesives, causing seams to separate and potentially leak.
For all waterproof items, we recommend using Nikwax and Granger products, specializing in detergents for outdoor gear.
If you have a zipper on a jacket that isn't functioning properly, chances are, you don't need a new jacket and you probably don't even need to send it in for a repair. Check out this video and learn how you can replace a broken zipper slider on your own.
Wading boots are made to take a beating and keep you upright. But there are steps you can take to extend their life and improve your traction. Remember, properly rinsing and drying your wading footwear is also important to stop the spread of aquatic invasives and threats to fish health like whirling disease. Clean. Drain. Dry,
Hydrolysis and dry rot occur when shoes or wading boots are wet from use and then stored for long periods without use, causing the rubber sole to completely degrade. The PU rubber used in shoe soles absorbs and retains moisture, and when shoes and boots are worn, that moisture is squeezed out of the rubber. If the boots are not used regularly, moisture will pool inside the rubber, leading to material breakdown.
We recommend taking your shoes and boots out a few times a year to maintain their rubber stretch and flex, and to keep them supple and dry. Because our boots are designed for wet environments, it's important to dry them completely before storing them and to wear them periodically to prevent dry rot. Dry rot and hydrolysis also happen to waders, typically in the glue on the seams. Dry rot and hydrolysis are not covered under warranty.
Maximize your traction by adding studs or cleats to your compatible wading boot sole. Find your model and options below.
Here are some general guidelines for selecting what's best for your wading needs:
In the video below, John Frazier explains best practices, answers frequently asked questions, and provides step-by-step instructions for installing cleats and studs into Simms' wading boots.
The BOA Lacing System featured in several Simms' wading boots is an incredibly convenient option. After miles and miles of river wear and tear, you might find yourself with broken lace, or a dial that's not functioning properly. If so, don't worry, it's actually a pretty easy fix. Check out this video and learn how you can make this repair yourself at home.
**PLEASE NOTE: REPAIRING YOUR OWN WADERS CAN IMPACT YOUR WARRANTY. IF IN DOUBT, PLEASE CALL 1-435-792-7897**
Make sure your waders are in tip top condition before the season kicks into full swing. In this video, Simms’ repair technician, Cameron McDonald walks you through the simple process of finding and, if you're in a pinch or in the field, repairing pinholes in your own GORE-TEX® Waders. While many repairs can be made at home, if the repair needs expert attention, please contact our repair department at or call 1-888-585-3570.
**PLEASE NOTE: REPAIRING YOUR OWN WADERS CAN IMPACT YOUR WARRANTY. IF IN DOUBT, PLEASE CONTACT US**
Got a busted strap divider on your Simms Wader? Check out this video and learn how you can make the repair yourself and get back on the water quicker.
Learn how to use a wader patch kit to repair holes or tears in your Simms GORE-TEX and Toray Waders.
**PLEASE NOTE: REPAIRING YOUR OWN WADERS CAN IMPACT YOUR WARRANTY. IF IN DOUBT, PLEASE CONTACT US**
Fish harder and stay out longer with layering solutions engineered to enhance the performance of your entire system and allow for confidence in all conditions.
In this video, John Frazier provides step-by-step instructions for replacing the molded net bag on Simms's Daymaker Landing Nets.
In this video, John Frazier shows us how to attach the handles (both short and long) to Simms's Daymaker Boat Net.
Simms's Headwaters Sling Pack allows anglers to wear the pack over their left or right shoulder. In this video, John Frazier walks us through the ambidextrous feature and how to switch the strap to be worn on either side.